
1. Using Visual Assistance for Remote Support
As a company user, your primary function is to use Visual Assistance to initiate remote support sessions with your customers. Here’s how you can do it:
1.1. Initiating a Support Session
1 . Enter Customer’s Mobile Number
In the Visual Assistance Application Page, you’ll see a field labelled “Send SMS to connect with customer’s device.”
- Enter the customer’s mobile number and click Send.
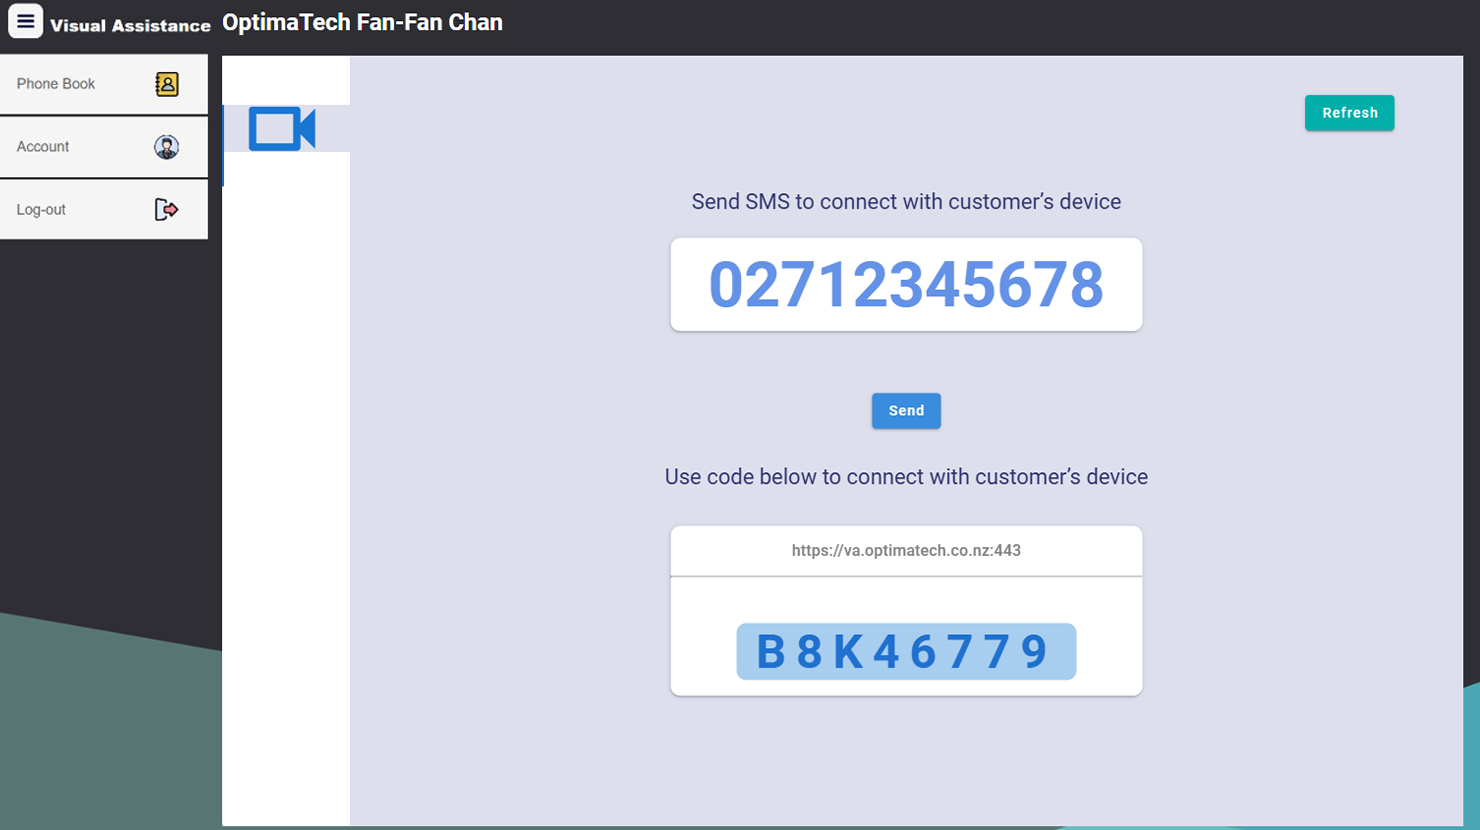
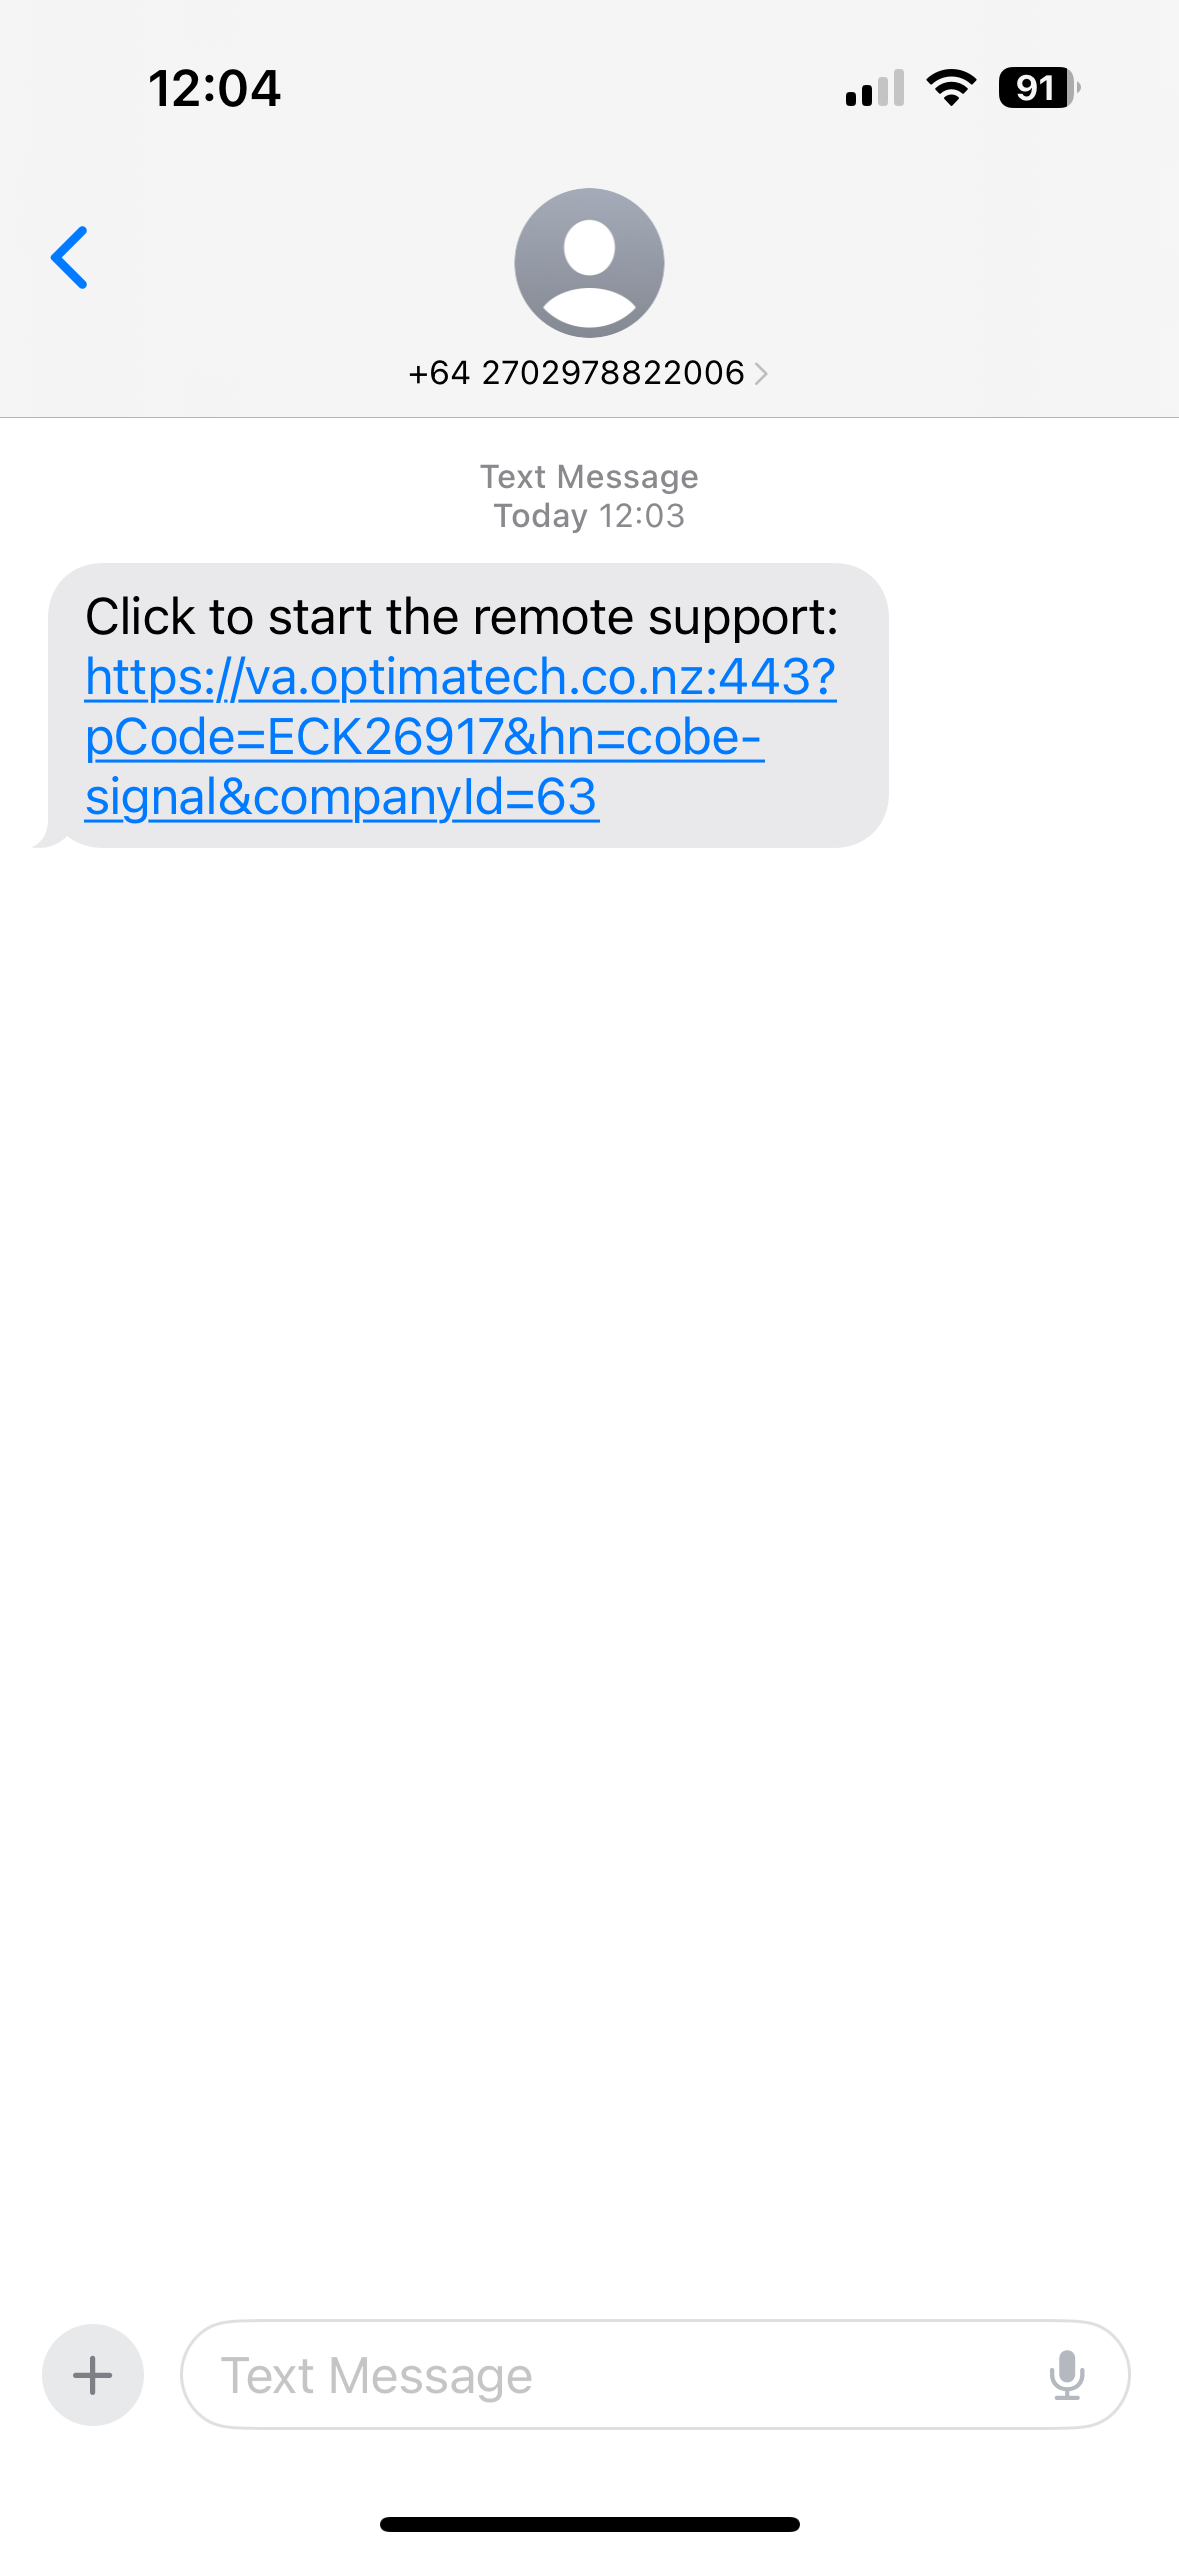
2. Customer Receives SMS
- The customer will receive an SMS containing a hyperlink to connect to the session.
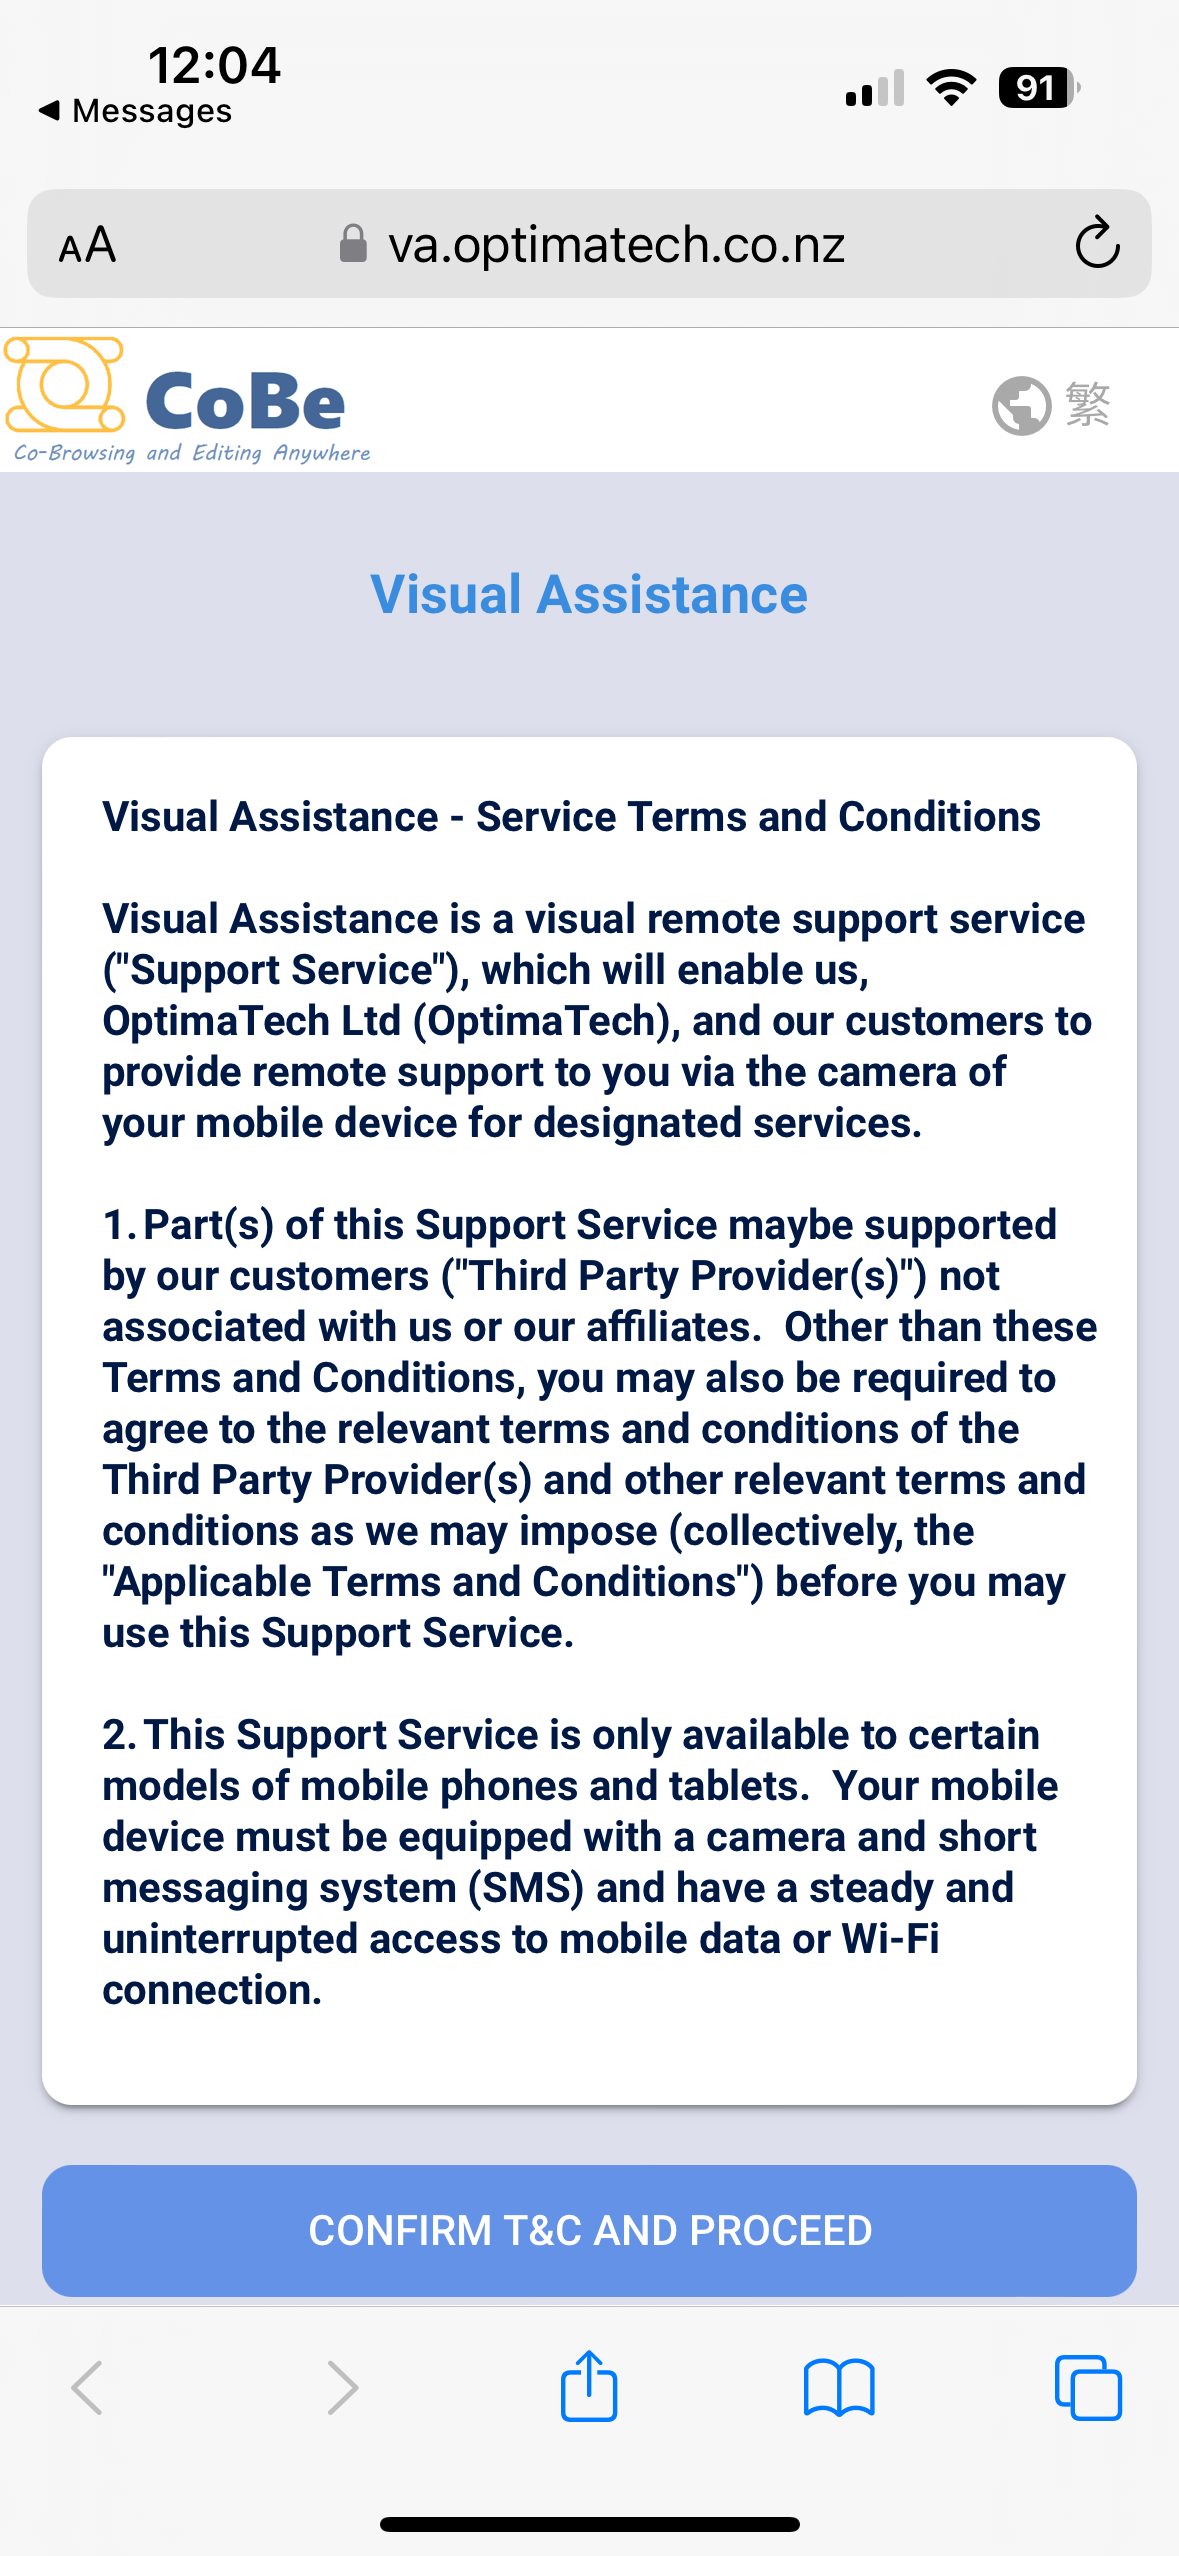
3 . Customer Confirms Terms & Conditions
- The customer clicks the hyperlink, opening a web browser where the Terms & Conditions of the solution are displayed.
- The customer must press “Confirm T&C and proceed” to continue.
4 . User Accepts the Session
Once the customer confirms the T&C, a prompt will appear on your screen:
“Customer requested to join the session, Accept?”
- You can choose either OK or Cancel. Press OK to continue.
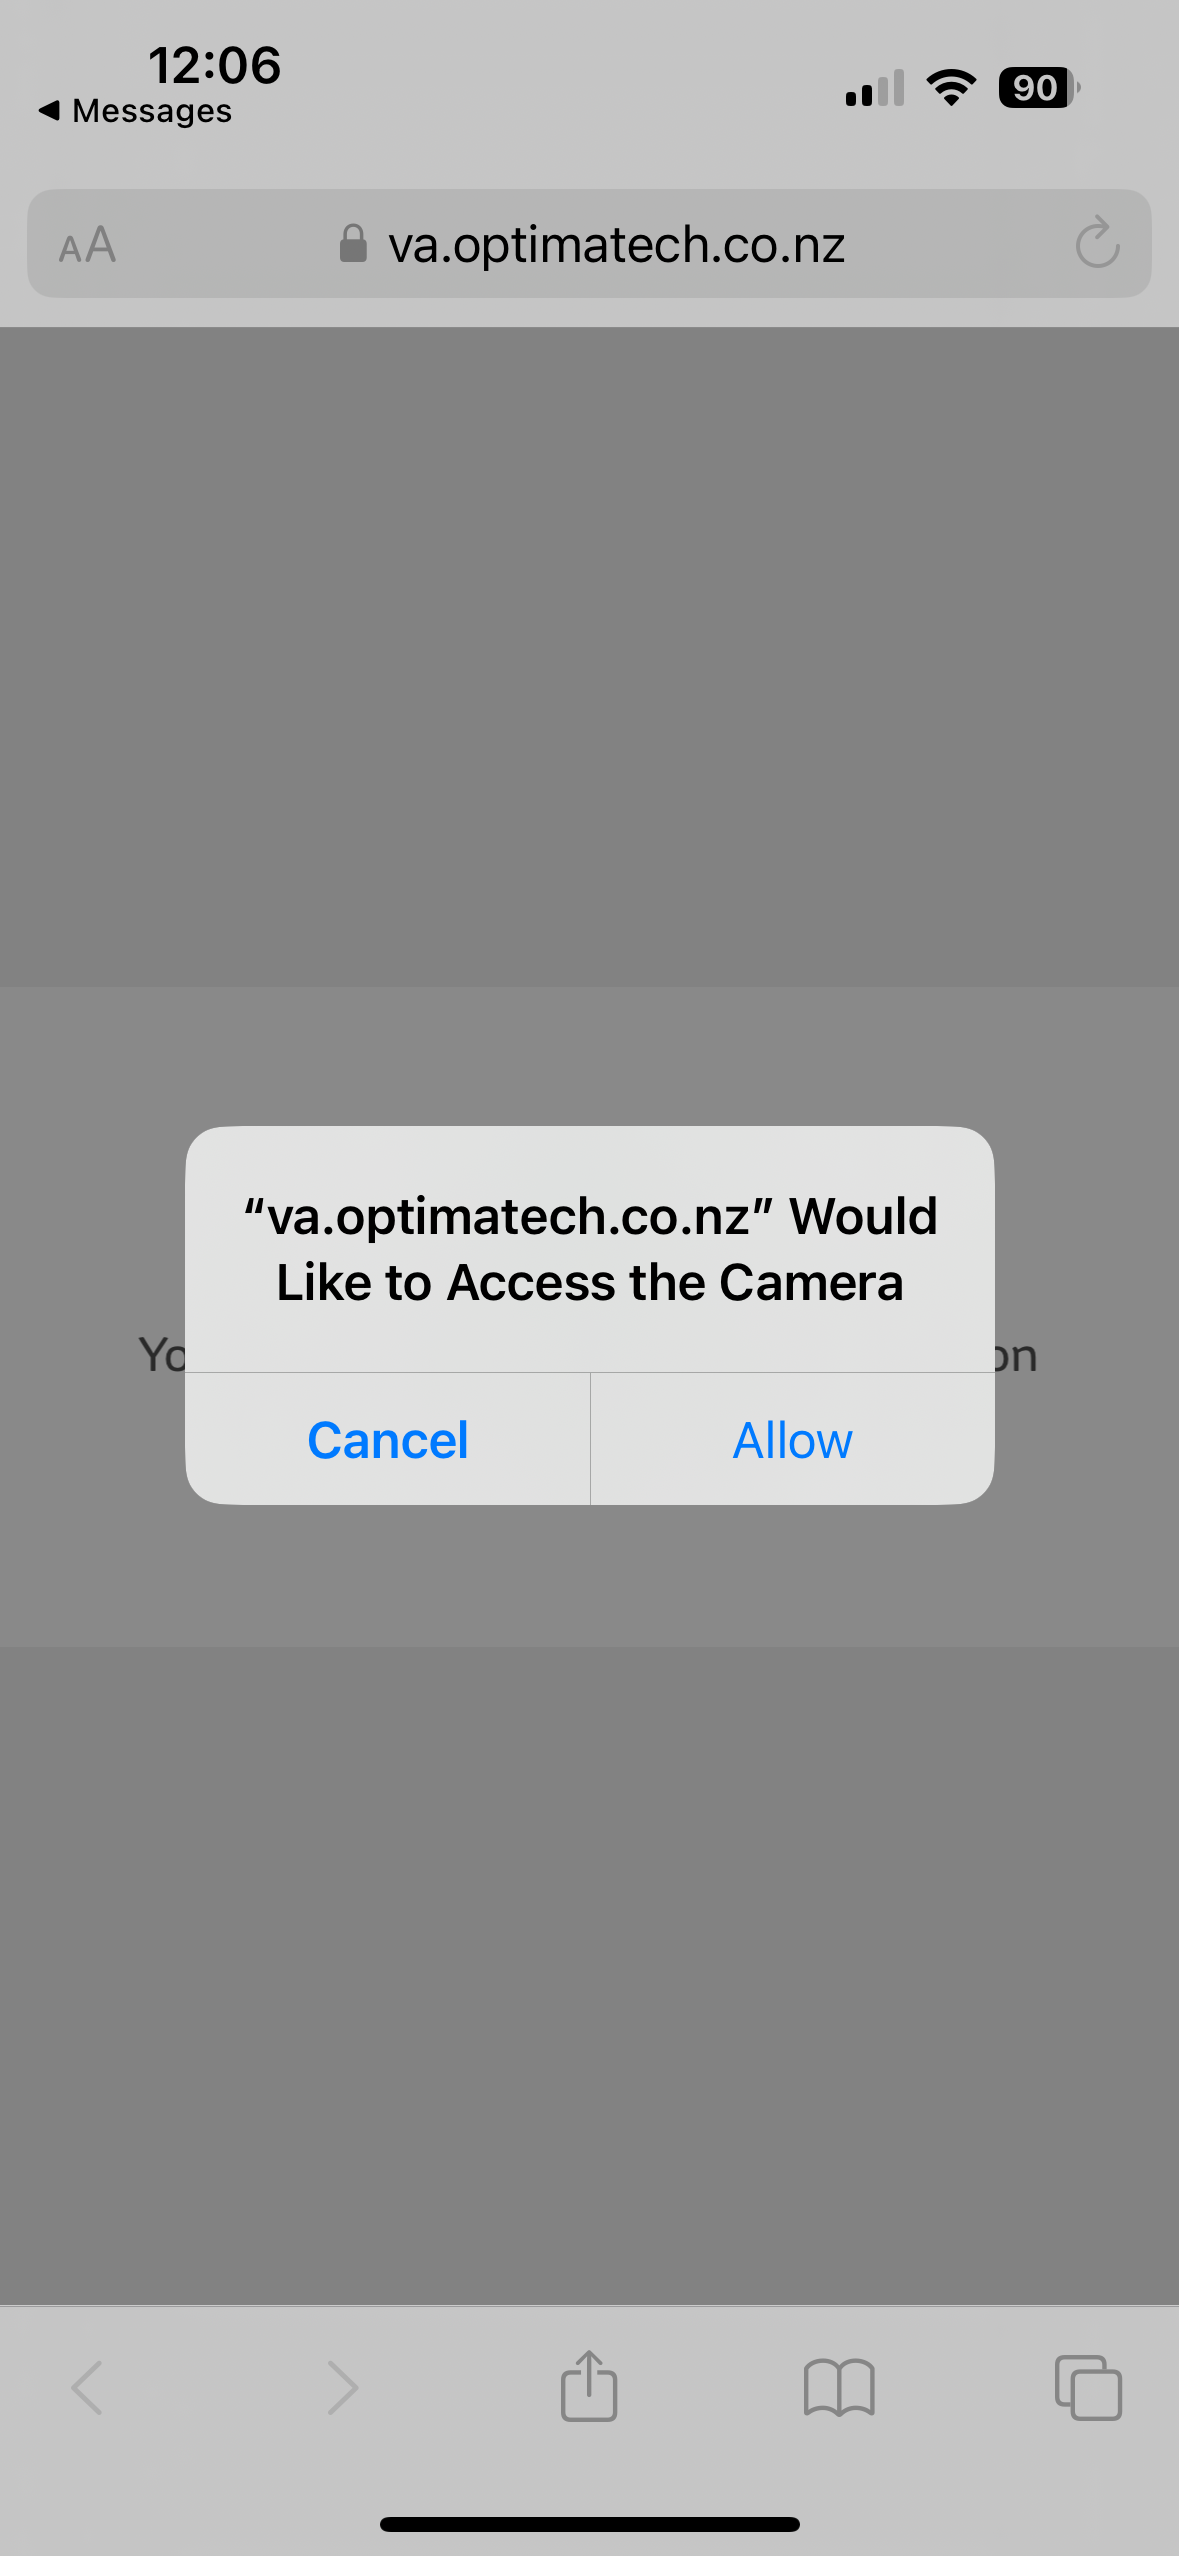
5 . Customer Grants Camera Access
- The customer’s device will prompt: “Visual Assistance would like to access the camera,” with options Allow or Cancel.
- The customer must press Allow for the camera to be enabled.
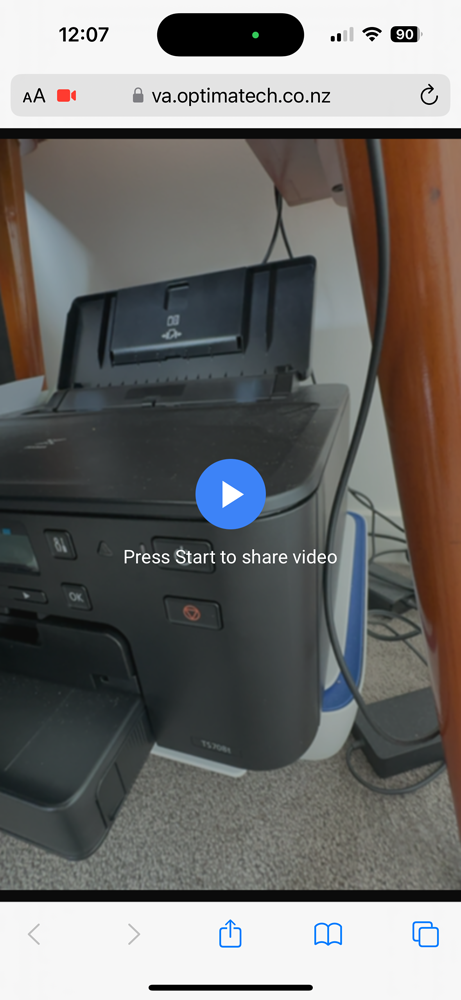
6 . Customer Starts Video Sharing
- The customer presses the “Start to share video” button, which begins the live video session.
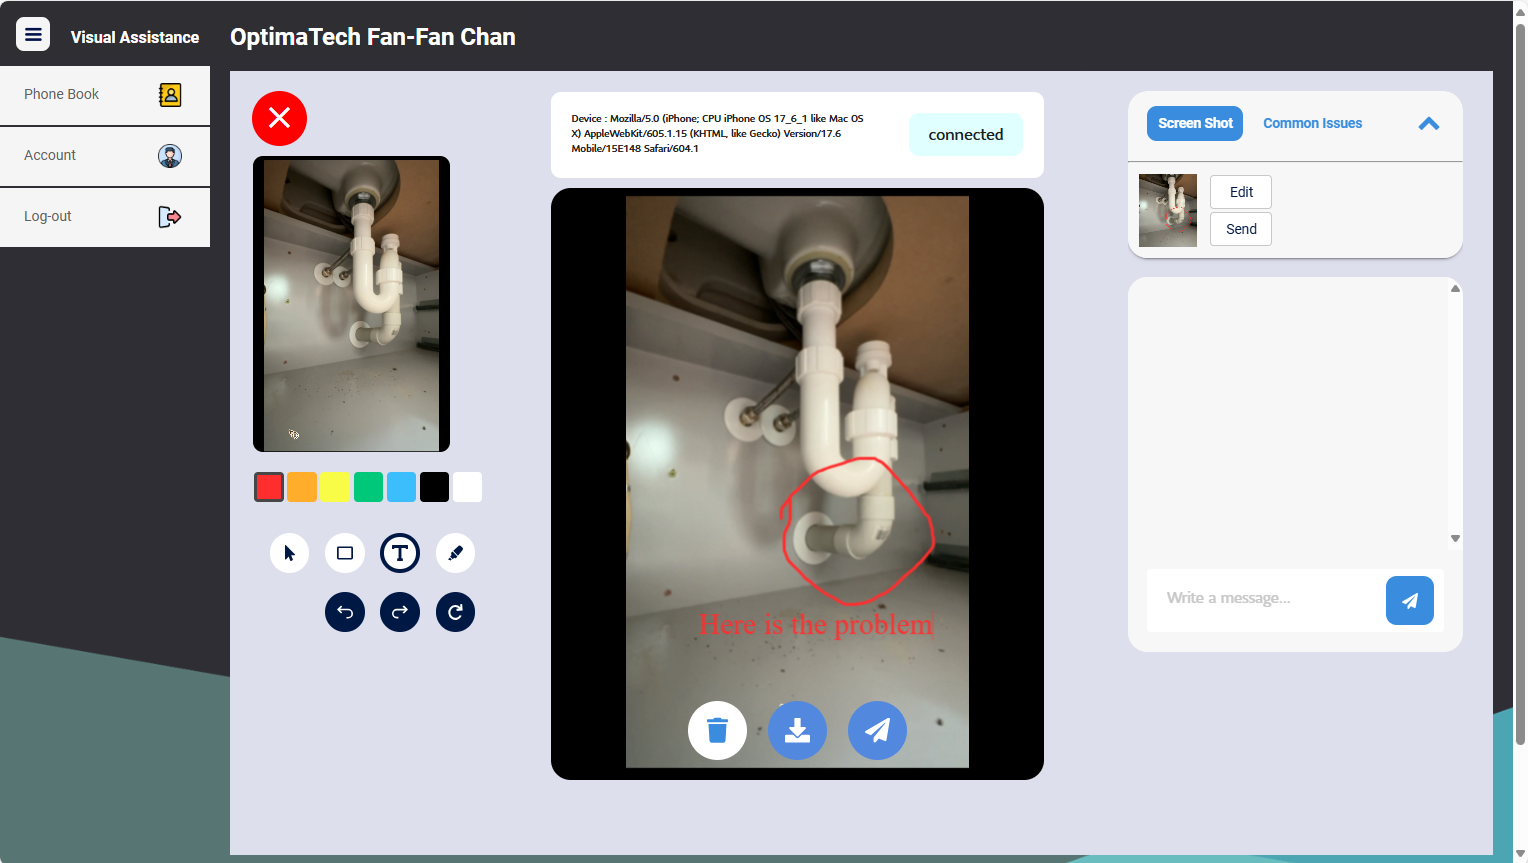
1 . 2. Providing Support During the Session
Once the session starts, you will have several tools at your disposal to assist the customer:
- Screen Capture: Take screenshots of the customer’s video feed.
- Annotation: Draw and annotate on the screen captures to guide the customer.
- Instant Messaging (IM): Use the built-in IM function to send messages and images to the customer.
1 . 3. Ending the Session
When the support session is complete, either you or the customer can end the session by clicking the Red Cross button in the interface.


